

- Xiphos Manual
- 1. Introduction
- 2. Getting Started with Xiphos
- 3. Interface
- 4. Preferences
- 5. Module Manager
- 6. The Search Function
- 7. The Studypad
- 8. The Personal Commentary
- 9. Journals and Prayer Lists
- 10. Getting Help Online
- 11. Original Language Research
At the top of the Xiphos main window is the menubar. Almost all of the functions are available by activating the appropriate menu item. The functions have been grouped according to their type. For example, the file operations have been grouped into the menu.

The function of the Toolbar is to provide control over the Bible and Commentary Panes. Activation of the Toolbar option is done by moving the mouse cursor over the desired toolbar button and selecting it. A tooltip will appear if the mouse cursor is held stationary over a toolbar button, describing the function of the button.

The Toolbar consists of the following functions:
History View Toggle and drop-down menu
Bible Book Selector
Bible Chapter Selector
Bible Verse Selector
Bible Passage Summary
Selects the Biblical book to be displayed in the Bible Text Pane and Commentary Pane. Changes take immediate effect.
Selects the Biblical chapter of current book to be displayed in the Bible Text Pane and Commentary Pane. Changes take immediate effect.
Selects the Biblical verse of current chapter to be displayed in the Bible Text Pane and Commentary Pane. Changes take immediate effect.
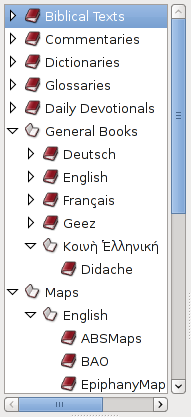
On the left hand side of Xiphos there is the Sidebar. Here the user can switch between the different Sword modules, view bookmarks, do simple searches and view verse lists. In the Modules listing, a module may be chosen for viewing in the current tab of the main window by clicking it. Using the context (right-click) menu, other options are to open a new tab using the module, open a separate (i.e. detached) window, or to view the "About" information for the module.
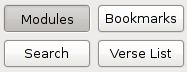
To switch between all Sidebar functions, buttons have been placed at the top of the Sidebar.
- 3.4.1. Opening A Specific Bible Translation
- 3.4.2. Using the Parallel View Mode
- 3.4.3. Opening A Separate Bible Translation
- 3.4.4. Finding Out About The Current Translation
- 3.4.5. Module Options
- 3.4.6. View Options
- 3.4.7. Display Control with CSS
- 3.4.8. User Annotation
- 3.4.9. Geography Support
- 3.4.10. Specific Word Meanings
- 3.4.11. Finding A Specific Word
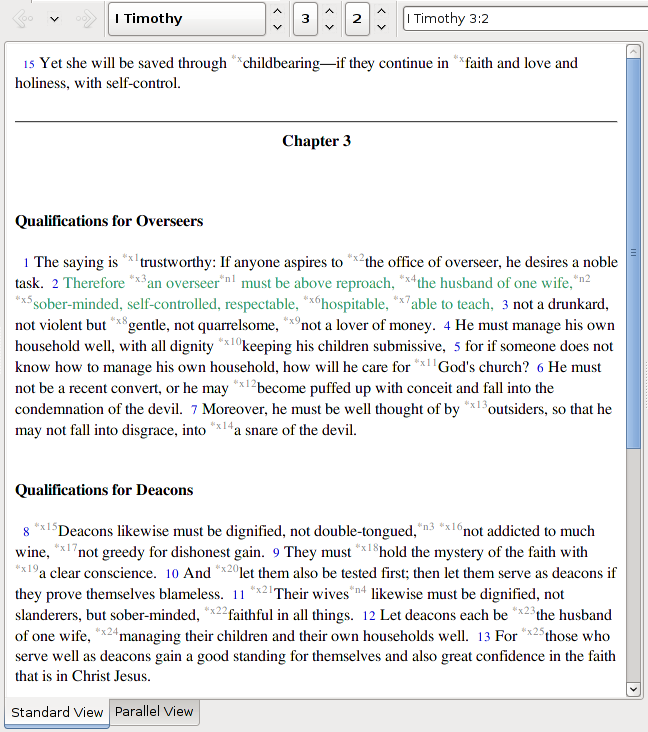
Positioned to the right of the Shortcut bar is the Bible text pane. All translations are displayed here. When starting Xiphos, the translation last used in the leftmost tab will be displayed.
In order to change the current Bible translation to another of your choice:
right-click in the Bible Text Pane. In the popup menu choose → and select your specific translation that you want to view.
under the option in the Sidebar, choose → and select your specific translation.
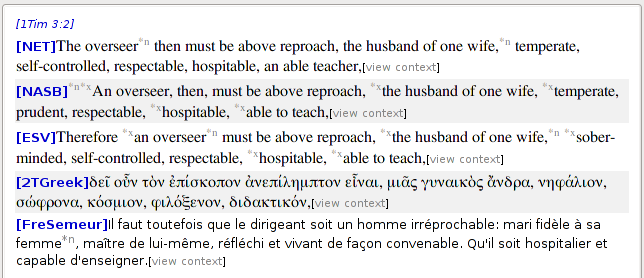
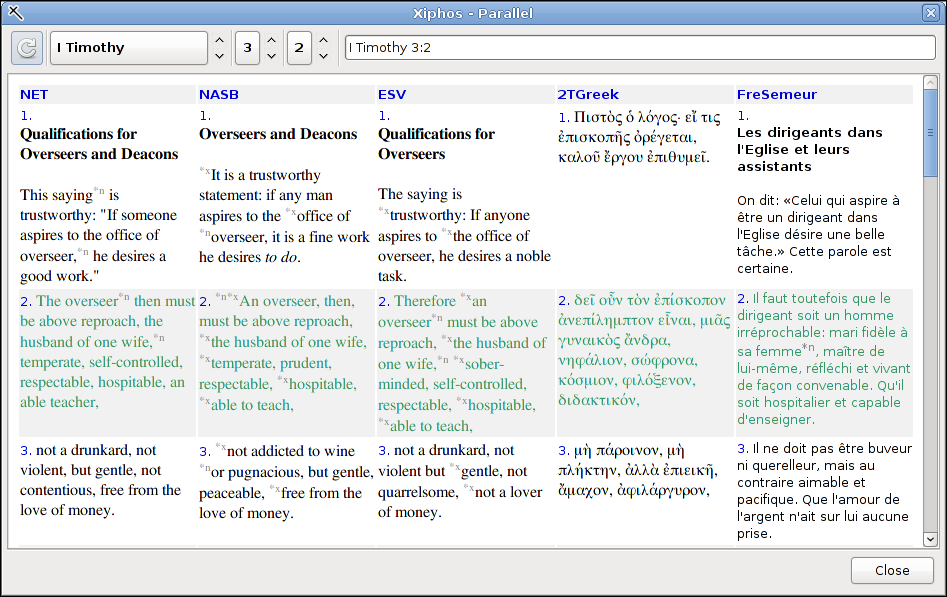
A nice function in Xiphos is the ability to view your specified bible text in several parallel translations of your choice. The Parallel View mode can be accessed by selecting just below the Bible Text Pane, next to the tab.
You must choose which modules to display in parallel with the dialog found under the menu. In the dialog, choose Modules, then Parallel. You can add or subtract from the list of modules that will be shown in the parallel view. The toolbar gives you a selector tool to erase the list, delete a module from the list, and add modules to the list.
The shows just one verse at a time. You can change the verse by selecting another verse, chapter, or book at the toolbar. Also note that modules that are Old Testament or New Testament only (e.g. Westminster Leningrad Codex, Byzantine Majority Text) will not be able to display books that they don't have.
Additionally, a separate Parallel View window can be selected from the right click menu with . Your Bible pane will return to its normal single text view, and the new Parallel View window will show the complete chapter, showing the same translations.
In order to view a Bible translation separate from the Xiphos main window interface, under the option in the Sidebar, choose → . Then right-click on a translation and choose . The module will open in a separate, detached window of its own.
Detached Bible and commentary windows have a synchronization button in the upper-left position beside the navigation bar. When this button is depressed, the main window Bible and commentary will synchronize with detached Bible and commentary windows. The synchronization goes both ways: Any detached window will synchronize navigation with all other detached Bibles and commentaries plus the main window, and the main window will drive all detached Bibles and commentaries whose synchronization button is depressed.
To find out about the Bible translation currently being displayed:
right-click in the Bible Text pane. In the popup menu choose module name.
Under the option in the Sidebar,choose → . Then right-click on a translation and choose the option.
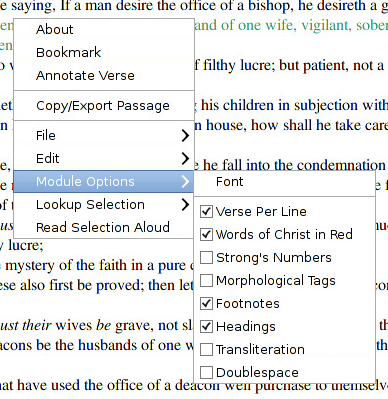
Most Bible translations have additional options which the user can select.
Words Of Christ In Red
Strong's Numbers
Morphological Tags
Footnotes
Scripture Cross-Reference
Headings
Image Content
Note
Translations in other languages such as Greek or Hebrew have specific options which deal only with the specific language.
In order to access these options:
right-click in the Bible Text pane. In the popup menu (example shown), choose and select the specific option.
There are several additional modes that can be selected from the menubar's pulldown.

The first 4 checkboxes control whether each named subwindow is displayed. The viewable state of the subwindows is remembered on a per-tab basis. This makes it possible, for example, to have a tab dedicated to a maps module alone (in a dictionary module, having alphabetically-listed places), by turning off the display of Bible, Previewer, and Commentary for that tab.
The remaining checkboxes control these other display features:
Link Tabs - When more than one tab is open, each one's verse is navigated separately in the disabled case. If tab linking is enabled, then all tabs navigate together, keeping all translations on the same verse.
Read Aloud - If you enable this, then Xiphos will funnel all selected verses through the festival text-to-speech system. Festival is a widely-available TTS, often installed by default in Linux distributions.
Also, mouse-selected text may be read aloud from Bibles, commentaries, and general books, using the right-click menu, regardless of whether Read Aloud is selected.
Show Verse Numbers - Normally enabled, this toggle can be disabled to prevent display of verse numbers within the text.
Highlight Current Verse - Initially disabled, this toggle replaces mere alternate colorization of the current verse with a substitute high-contrast highlight. The colors used may be selected from the Preferences dialog.
Users familiar with CSS (cascading style sheets) may wish to create the file "default-style.css" in the .xiphos directory to contain whatever CSS controls are desired. Beware, it is very easy to shoot oneself in the foot with CSS, and this will affect all modules' display. The facility exists to provide the capability that advanced users may wish.
Many users wish to make personal annotations on individual verses, without the need to put a full "personal commentary" module to use. Xiphos provides this in the right-click context menu in the Bible pane. This brings up a dialog showing the current verse reference and offering a text box into which to enter a brief personal note. Once the user closes the dialog with "Annotate Verse," the verse will be displayed in reverse-highlight (default, blue on yellow) and a marker will be inserted at the verse's beginning. This is metaphorically similar for users who mark verses in paper Bibles with a yellow highlighter and write personal notes in the margins.
Selecting an already-annotated verse will (in the usual case) bring up the existing content for re-editing. An already-annotated verse can be unmarked; the verse will cease to show in reverse-highlight.
If the user deletes the module name from the reference at the top of the dialog, then the annotation will apply to any Bible module at the selected verse. However, in this case, re-selecting the annotated verse will not initialize with the existing content, because the dialog is created based on the specific module reference.
A connection to browsing BibleMap.org is available by mouse-selecting a place name in any text. Use the right-click context menu to select → . A web browser will be brought up to show the selected name's geography via BibleMap, which provides Biblical detail overlaid on a Google Maps interface.
In order to check the meaning of a specific word, double-click on the word you wish to lookup. The word should then highlight itself and the explanation should be displayed, if available, in the Dictionary Pane.
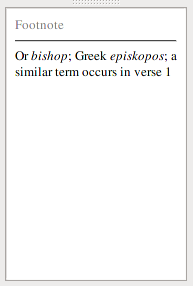
The Previewer is where the user sees Strong's numbers, morphological tags, footnotes, and cross-references that the Bible Text Pane provides.
Footnote content is displayed in the Previewer when you hover over the indicator in the Bible text; it remains visible until your mouse moves over another indicator, Strong's number, etc. Sometimes you may want the text to remain anchored until you can move the mouse to the previewer to click on a link or to read large footnotes. To anchor the text so that you can scroll it in the Previewer, middle-click the indicator (or hold down the ) and move to the Previewer.
Cross-reference indicators work much the same way. Clicking the indicator will send the set of references to the in the Sidebar, where you can click them individually for reading in the Previewer. Alternately, a Preferences selector is available, so that cross-reference lists are sent to the verse list instead.
Any verses shown in reverse-highlight have personal annotation associated with them, and such verses will include at the beginning of the verse. Hovering on this marker will show the annotation in the previewer, just as for publisher's footnotes.
If a devotional has been set via the Preferences dialog, then the day's devotional reference will also appear in the previewer, either on program startup or when the user requests it via the menu.

The Commentary pane is where the commentary modules are displayed. This provides easy reading, reference, and access to different commentaries currently installed. The passage viewed by the Commentary pane is directly controlled by the current passage viewed in the Bible Text pane, so in order to change to a different passage commentary, select the desired passage on the Toolbar.
If there are images that are part of a commentary, general book, or dictionary/lexicon, they may be clicked to invoke a viewer on that single image, in order to get a better view. This is particularly useful if image resizing has been enabled with the result that images are made very small in the subwindow.
Note
By changing to passage settings on the Toolbar, the contents in the Bible Text pane and the Commentary Pane will be changed.
To find out about the commentary currently being displayed:
right-click in the Commentary Pane. In the popup menu choose module name.
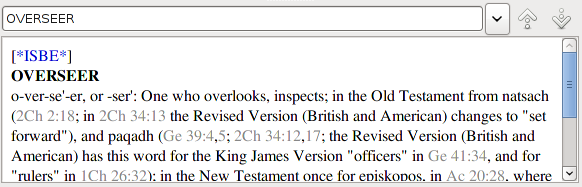
The Dictionary Pane's content is driven by its up/down selectors, typing in its navbar text, or double-clicks in the Bible, Commentary, or Book Panes.
Several keyboard shortcuts exist in Xiphos, listed below in rough functional groupings.
Window selection/opening and navbar selection:
focuses and selects the main verse navbar text. You can then immediately type in new verse selection text. Be aware that, as is the case with most Sword applications, Xiphos understands many abbreviations: "G" is adequate to specify Genesis, for example, and any book name by itself implies 1:1.
brings the Commentary View forward when previously obscured by the Book View.
is the opposite of Alt-C, focusing on the general book.
focuses on the dictionary navbar text.
opens a new tab.
makes the Nth tab current.
Verse navigation and Bible features:
: Verse previous/next. Also .
: Chapter previous/next.
: Book previous/next.
brings up the context menu for the Bible pane.
: Toggle Strong's display.
: Toggle morphology display.
: Toggle "red words of Christ" display.
Opening special windows:
opens this manual.
: opens the dialog.
: opens .
: brings forward the simple sidebar search.
: opens the .
opens an annotation dialog on the current verse.
opens a bookmark dialog on the current verse.
opens the "Find" dialog. The subwindow to which it applies depends on which of them are visible: The Bible is first preference, then the commentary or general book, then the dictionary. So a tab can be dedicated to just a book, and Ctrl-F will perform "Find" within that pane.
detaches/re-attaches the parallel view dialog.
opens editor on the personal commentary named Personal.
Font size control:
increases/decreases the base font size.
(zero) sets the base font size to zero.
BibleSync:
puts BibleSync into Personal mode.
puts BibleSync into Speaker mode.
puts BibleSync into Audience mode.
turns off BibleSync.
causes BibleSync to navigate your current main window point transiently as a one-shot event. BibleSync must be transmit-ready, that is, in Personal or Speaker mode.